

So you’ve finished the hustle and bustle of being on a film set. You’re now sitting down in the editing suite to finish piecing together your masterpiece. The first shot is pulled up on the big screen and you gasp! You swear that it didn’t look that way on set. What gives?
When there are a million different things happening all at once during production, sometimes it’s easy to overlook certain details that have the potential to affect your process in post. Did the makeup artist forget to powder your talent’s left cheek, was the lamp too yellow in the back of the scene, or did the sun peak out halfway through your best take and now the shot is too bright? All of these are problems that you sometimes cannot avoid while filming. That’s where ‘color correction’ and ‘color grading’ come into play during the post production phase.
So what’s the difference between color correction and color grading?
Color correction is the process of fixing the above problems and more. You’re able to modify skin tones, re-expose your shots, and even match different camera shots together.

Color grading comes after the correction process and is where you add your style. If you’re creating a western, this is where you would de-saturate your image and add that western grit. It’s where you would overlay an unhealthy amount of green throughout your picture during your personal reboot of The Matrix. You could even go for an iconic, yellow, Amélie look since your recent French lessons have inspired you to do so.
“Whoa! I can’t wait to pitch to my boss that we do a corporate Matrix reboot!” I know, I’m excited too! You can credit me as your co-writer but before you run off to work on your trilogy, I have just a few more things to show you.
 You’re in the color suite and you look up to see your image looking really “flat” and void of color. Why on earth does it look this way? Don’t panic. Believe it or not, this is actually done on purpose.
Recording your image “flat” allows for more data to be captured in the highlights and shadows. When things slow down and time comes for your coloring session, we are then able to manually rebuild the image with more data than we would have originally had.
Here’s another way of looking at it. Imagine we have an inflated balloon too big to fit in a box. We are able to deflate that balloon, place it in the box, and manually blow it back up to the exact size it needs to be just before popping in our box. This allows us to squeeze every tiny bit of space out of our balloon. The exact same is happening with our video data. We are deflating our data to retain as much information as possible and then selectively expanding it to perfectly fit within our box. Pretty neat, right?
Now, I know what you’re thinking… you’re getting pretty bored of all of this text. How about we wrap this up and get to some actual examples? Below you’ll find just that–examples of “before” and “after” with a little bit of information about what was done.
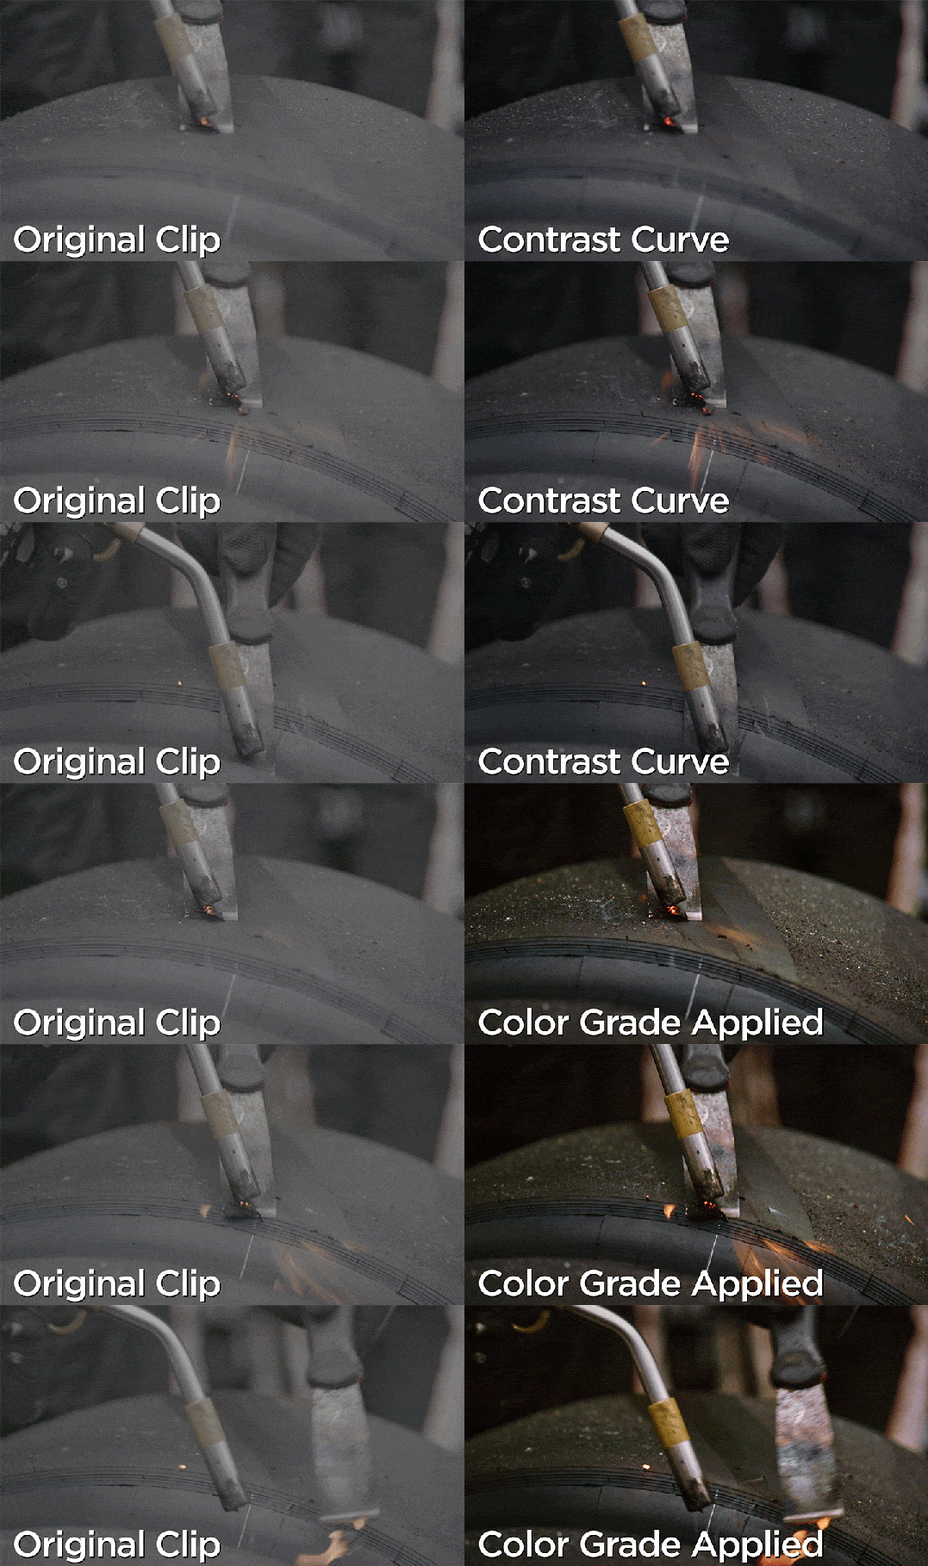
A detailed tight shot of a pit crew member scraping unwanted debris from a NASCAR tire. On the left is the original shot. The right displays the two step process to giving us a more gritty and intense look.
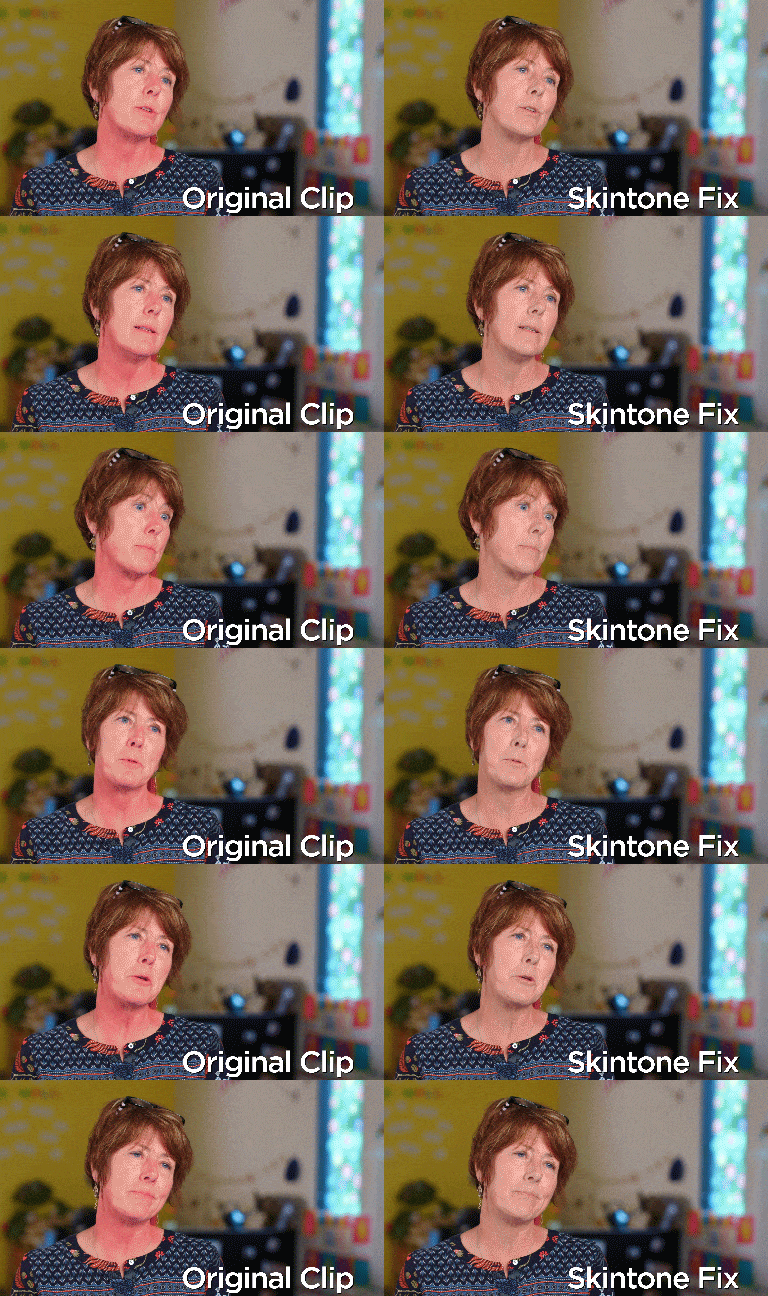
On occasion we have an interviewee who may have just returned from a long weekend at the beach. All too often this happens where a bit of skin clean up is needed. We easily selected the unwanted pink & red and shifted if back to the appropriate skin tone area.
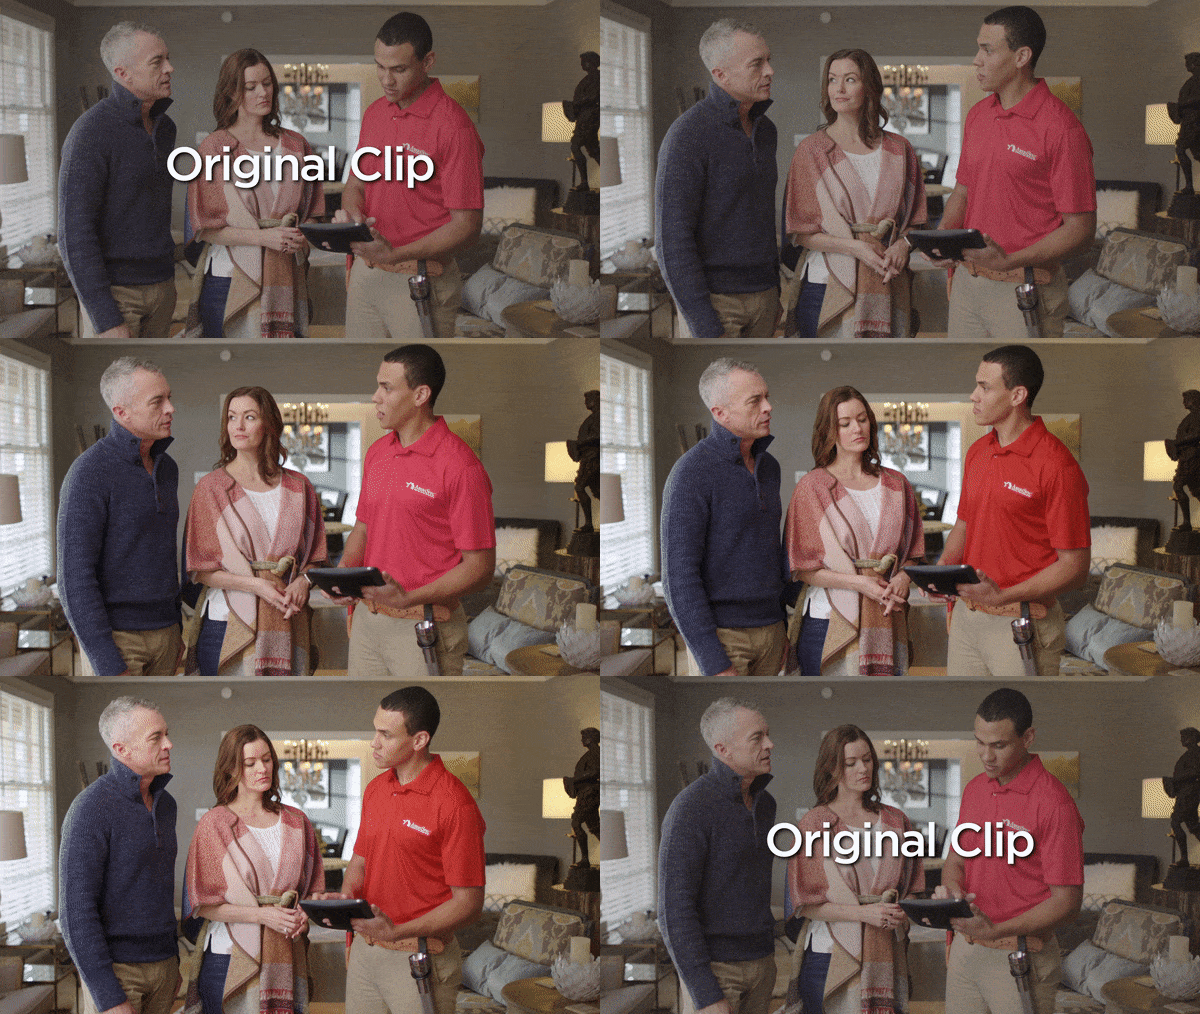
This is a 3 step process showing a shift in the shirt of the employee on the right. The shirt’s color was a little off from the company’s logo color so we had to correct it a bit. We also did a bit of exposure control to force your eye more towards the faces in the scene.
If you have more questions or care to learn more about this magical process, feel free to email Mitch at “MMartin@Runningpony.com”.

